
1 Introduction
Deep learning has been widely used in daily lives, ranging from quantum size to the universe. In last 10 years, with the computational power growing exponentially, deep learning like Convolutional Neural Network has become possible. CNN has been heavily used in image processing, and eventually surpassed human performance in image recognition. Here I am going to demonstrate how to implement CNN with simple code, in PyTorch. This post will be straight to the point as I am busy this week.
So why PyTorch, PyTorch is the most popular deep learning framework for AI researchers, which is easier to use than TensorFlow (but not in term of portability). This post will show simplest usage of deep learning which is beginner-friendly.
2 Pre-requirement
To follow the post of this week, you might need to have the following requirements. Of course you can read the post without understanding them first.
- Fundamental of Python Programming
- Python3 installed
- PyTorch installed
- matplotlib installed
- tqdm installed
3 The Task
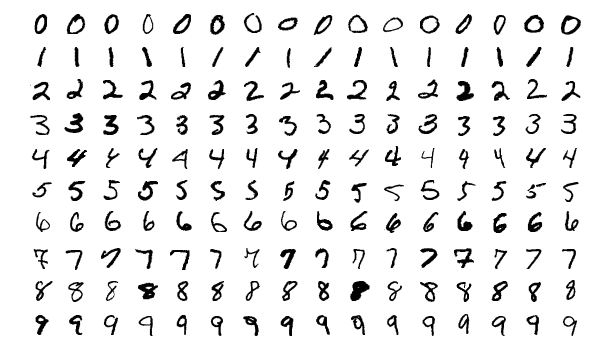
Our task here is to classify the digits 0-9 from the handwritten digits dataset, MNIST. MNIST contains 70,000 images of handwritten digits: 60,000 for training and 10,000 for testing. The images are grayscale, 28×28 pixels, and centered to reduce preprocessing and get started quicker. MNIST is one of the ‘hello world’ for image classification beside ‘dogs and cats’ dataset(binary classification).
MNIST dataset origin: http://yann.lecun.com/exdb/mnist/
4 Prepare the library
Here we go, first step is to import the necessary libraries. ‘torch’ is PyTorch library while ‘torchvision’ is PyTorch image library.
import torch
import torchvision
5 Create DataLoader
DataLoader are PyTorch module that feed the Datasets’ data to the Trainer for training and evaluation. PyTorch require the dataset feeding in DataLoader. Let’s create our DataLoader with MNIST dataset. With aids from ‘torchvision’, the MNIST dataset can be download automatically, so let’s skip the download step here.
Set the training batch size to 64, with small batch size we might converge better, and with less memory usage too.
What Is a Batch?
Adapted from: https://machinelearningmastery.com/difference-between-a-batch-and-an-epoch/
The batch size is a hyperparameter that defines the number of samples to work through before updating the internal model parameters.
Think of a batch as a for-loop iterating over one or more samples and making predictions. At the end of the batch, the predictions are compared to the expected output variables and an error is calculated. From this error, the update algorithm is used to improve the model, e.g. move down along the error gradient.
A training dataset can be divided into one or more batches.
When all training samples are used to create one batch, the learning algorithm is called batch gradient descent. When the batch is the size of one sample, the learning algorithm is called stochastic gradient descent. When the batch size is more than one sample and less than the size of the training dataset, the learning algorithm is called mini-batch gradient descent.
Batch Gradient Descent. Batch Size = Size of Training Set
Stochastic Gradient Descent. Batch Size = 1
Mini-Batch Gradient Descent. 1 < Batch Size < Size of Training Set
In the case of mini-batch gradient descent, popular batch sizes include 32, 64, and 128 samples. You may see these values used in models in the literature and in tutorials.
We define the image transform function to normalise our images which can help the model converge faster and better.
With using torchvision.datasets.MNIST, we import the pre-baked MNIST datasets from PyTorch, saving the time and hassle. here we have two seperated datasets, which are train and test.
A training dataset is a dataset of examples used for learning, that is to fit the parameters (e.g., weights) of, for example, a classifier.
A test dataset is a dataset that is independent of the training dataset, but that follows the same probability distribution as the training dataset. If a model fit to the training dataset also fits the test dataset well, minimal overfitting has taken place (see figure below). A better fitting of the training dataset as opposed to the test dataset usually points to overfitting.
Source: https://en.wikipedia.org/wiki/Training,_validation,_and_test_sets
A test set is therefore a set of examples used only to assess the performance (i.e. generalization) of a fully specified classifier.
Then we construct DataLoader for each datasets, with the batch size we set previously.
## Create dataloader, in PyTorch, we feed the trainer data with use of dataloader
## We create dataloader with dataset from torchvision,
## and we dont have to download it seperately, all automatically done

# Define batch size, batch size is how much data you feed for training in one iteration
batch_size_train = 64 # We use a small batch size here for training
batch_size_test = 1024 #

# define how image transformed
image_transform = torchvision.transforms.Compose([
                               torchvision.transforms.ToTensor(),
                               torchvision.transforms.Normalize(
                                 (0.1307,), (0.3081,))
                             ])
#image datasets
train_dataset = torchvision.datasets.MNIST('dataset/',
                                           train=True,
                                           download=True,
                                           transform=image_transform)
test_dataset = torchvision.datasets.MNIST('dataset/',
                                          train=False,
                                          download=True,
                                          transform=image_transform)
#data loaders
train_loader = torch.utils.data.DataLoader(train_dataset,
                                          batch_size=batch_size_train,
                                           shuffle=True)
test_loader = torch.utils.data.DataLoader(test_dataset,
                                          batch_size=batch_size_test,
                                          shuffle=True)
It might take you a while to download the datasets for first run.
6 Visualise Data
Once the DataLoader are constructed, we can try to check the data with visualisation. Here we are going to use matplotlib, which is a powerful Python library for visualisation. We can see how ‘5’ looks like in the dataset. It in important to check how our data looks like before we proceed, as the beauty of data science lies in the data 😀
# import library
import matplotlib.pyplot as plt
# We can check the dataloader
_, (example_datas, labels) = next(enumerate(test_loader))
sample = example_datas[0][0]
# show the data
plt.imshow(sample, cmap='gray', interpolation='none')
print("Label: "+ str(labels[0]))
7 Create model
Since this is simple tutorial, there will not be feature engineering, etc. We can start training the model now. Are you getting excited? Oh, maybe you more like to see the result after training. But that’s still far from current progress, let’s move on step by step. Now we need a CNN model, which is the most important piece here. To create a PyTorch model, we can inherit PyTorch nn.Module class, let’s check the following example.
## Now we can start to build our CNN model
## We first import the pytorch nn module and optimizer
import torch.nn as nn
import torch.nn.functional as F
import torch.optim as optim
## Then define the model class
class CNN(nn.Module):
    def __init__(self):
        super(CNN, self).__init__()
        #input channel 1, output channel 10
        self.conv1 = nn.Conv2d(1, 10, kernel_size=5, stride=1)
        #input channel 10, output channel 20
        self.conv2 = nn.Conv2d(10, 20, kernel_size=5, stride=1)
        #dropout layer
        self.conv2_drop = nn.Dropout2d()
        #fully connected layer
        self.fc1 = nn.Linear(320, 50)
        self.fc2 = nn.Linear(50, 10)
    def forward(self, x):
        x = self.conv1(x)
        x = F.max_pool2d(x, 2)
        x = F.relu(x)
        x = self.conv2(x)
        x = self.conv2_drop(x)
        x = F.max_pool2d(x, 2)
        x = F.relu(x)
        x = x.view(-1, 320) # Flatten
        x = self.fc1(x)
        x = F.relu(x)
        x = F.dropout(x)
        x = self.fc2(x)
        return F.log_softmax(x)
We define our model as CNN(). This is a two layer convolutional neural network, with uses of dropout, max pooling and ReLU activation function.

To create the model, we must first calculate the model parameters. This is two convolutional layer model, with two max-pooling layer, two dropout, and using ReLU activation function.
To calculate the output size, of CNN layer, we have the formula:
![\[Output = \frac{Input - {Filter Size} + 2*{Padding}}{Stride} +1\]](https://jiuntian.com/blog/wp-content/ql-cache/quicklatex.com-4fa8b0fd1a3204f1f5597a321230c855_l3.svg "Rendered by QuickLaTeX.com")
To know how the CNN propagate, we can look at forward() function of the model class.
First, the model pass the image to first convolutional layer, with input being [1x28x28]. This convolutional layer have input channel of 1 and output channel of 10, filter size of 5, default padding 0, and default padding 1, by applying the formula we can calculate that the output size equals to [10x24x24].
Then it comes to a max-pool layer of size 2. Max pooling is a layer that have stride size same as filter size. The output is [10x12x12]. Then it’s passed to a ReLU activation function.
The model again went into another convolutional layer, with filter size of 5 and output channel of 20. The output size become [20x8x8]. Then there is a dropout layer that helps prevent overfitting. After another Max pooling layer with size of 2, the output become [20x4x4]. Then we have ReLU activation again.
After the convolutional part are done, we flatten out the previous output as size of 20x4x4 which is 320 and feed it into the fully connected layer. First FC layer have input size of 320 and output size of 50. After the ReLU and Dropout, the output is sent to another FC layer, with input size of 50 and 10. Finally the output is predicted at a softmax layer.
I know it’s kinda boring to some of you with this long description about this model, but in my opinion, it is good for beginner to understand how it works at least in this abstractive view. If you would like to know more about dropout, max pooling, convolutional, ReLU and how they works, feel free to email me at jiuntian (at) jiuntian (dot) com or leave me comments below, I skipping them here for brevity’s sake, since Google search is a great tool.
8 Parameters and Optimizer
After defining the model, we are going to set the parameters and choose a suitable optimiser for our training.
You can use cpu or GPU to train. Here I use CPU.
I use SGD optimiser to train the model here.
## create model and optimizer
learning_rate = 0.01
momentum = 0.5
device = "cpu"
model = CNN().to(device) #using cpu here
optimizer = optim.SGD(model.parameters(), lr=learning_rate,
                      momentum=momentum)
9 Train and Test function
We use tqdm to show progress bar in Jupyter notebook for training process. tqdm means “progress” in Arabic (taqadum, تقدّم) and is an abbreviation for “I love you so much” in Spanish (te quiero demasiado).
In the following function, we will iterate through the mini batch and update the gradient.
from tqdm import tqdm_notebook as tqdm
##define train function
def train(model, device, train_loader, optimizer, epoch):
    model.train()
    tk0 = tqdm(train_loader, total=int(len(train_loader)))
    counter = 0
    print("Epoch "+str(epoch))
    for batch_idx, (data, target) in enumerate(tk0):
        data, target = data.to(device), target.to(device)
        optimizer.zero_grad()
        output = model(data)
        loss = F.nll_loss(output, target)
        loss.backward()
        optimizer.step()
        counter += 1
        tk0.set_postfix(loss=(loss.item()*data.size(0) / (counter * train_loader.batch_size)))
##define test function
def test(model, device, test_loader):
    model.eval()
    test_loss = 0
    correct = 0
    with torch.no_grad():
        for data, target in test_loader:
            data, target = data.to(device), target.to(device)
            output = model(data)
            test_loss += F.nll_loss(output, target, reduction='sum').item() # sum up batch loss
            pred = output.argmax(dim=1, keepdim=True) # get the index of the max log-probability
            correct += pred.eq(target.view_as(pred)).sum().item()
    test_loss /= len(test_loader.dataset)

    print('\nTest set: Average loss: {:.4f}, Accuracy: {}/{} ({:.0f}%)\n'.format(
        test_loss, correct, len(test_loader.dataset),
        100. * correct / len(test_loader.dataset)))
10 Model Training
Now we are going to train the model(finally). Here we are going to train for 10 epoch. This simply means that we will calling the function we defined previously 10 times.
What Is an Epoch?
Adapted from https://machinelearningmastery.com/difference-between-a-batch-and-an-epoch/
The number of epochs is a hyperparameter that defines the number times that the learning algorithm will work through the entire training dataset.
One epoch means that each sample in the training dataset has had an opportunity to update the internal model parameters. An epoch is comprised of one or more batches. For example, as above, an epoch that has one batch is called the batch gradient descent learning algorithm.
You can think of a for-loop over the number of epochs where each loop proceeds over the training dataset. Within this for-loop is another nested for-loop that iterates over each batch of samples, where one batch has the specified “batch size” number of samples.
num_epoch = 10
for epoch in range(1, num_epoch + 1):
        train(model, device, train_loader, optimizer, epoch)
        test(model, device, test_loader)
When running this part of code, you will be showed the training progress and test result for each epoch. If everything works well, the accuracy should increasing until the training become overfitted. Here you can see tqdm progress bar which show the progress and in the test/validation part, we can know that our model achieve an accuracy of 98%.

11 Conclusion
You may find the source code of this post on my Github, https://github.com/jiuntian/pytorch-mnist-example. Please correct me if there’s anything wrong here.